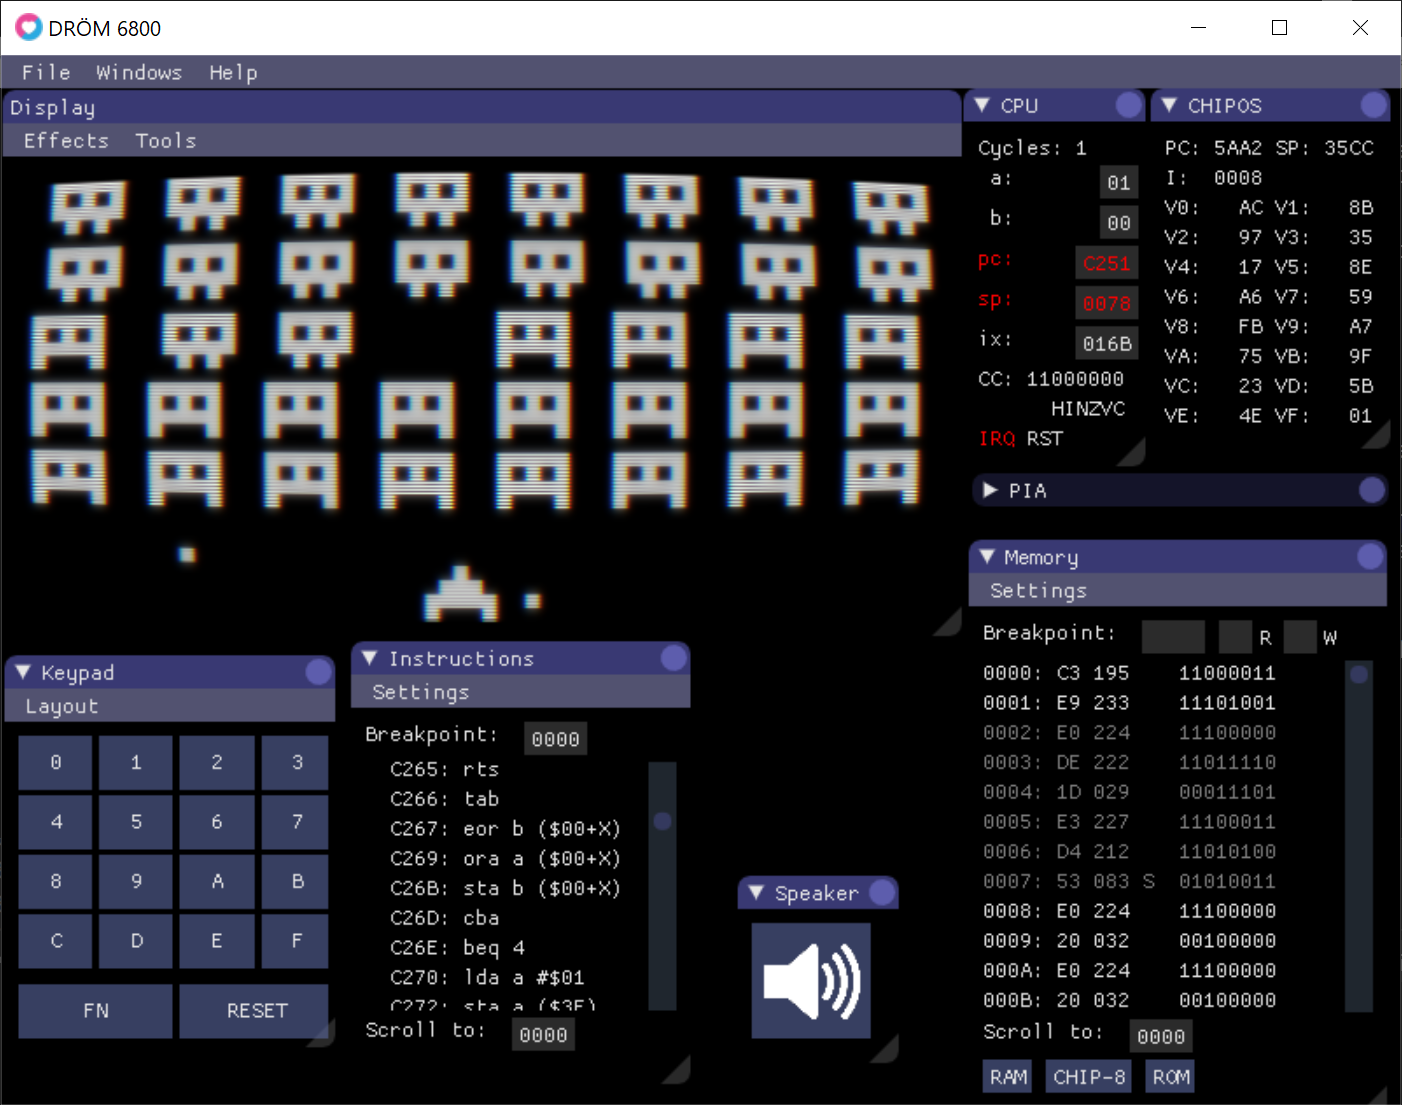
An emulator UI
The RetroChallenge is over, and I finished my project, the DREAM 6800 emulator DRÖM.
This post is part of a series on writing an emulator for the DREAM 6800 computer. Read the DREAM 6800 posts and look at the emulator’s repository.
First off: To download the emulator, head over to DRÖM’s GitHub Releases page.
Part of the reason I wanted to make a DREAM 6800 emulator was because I found the graphical user interface in the only other DREAM emulator I found, MAME, a bit lacking.
I don’t want to criticize MAME too much. It’s a great project, and it emulates the DREAM accurately. However, it’s the only other DREAM emulator (that I’m aware of), so it’s hard not to compare it with mine.
To sum up my first DRÖM blog post, here are the main issues I had with MAME:
- It was hard to get running
- Scaling uses a linear interpolation, making the display extremely blurry
- The debug interface uses many popup windows, and keyboard shortcuts only work while the relevant window has focus (making it impossible to single step while pressing a keypad key)
- The DREAM’s hexadecimal keypad is mapped all over the keyboard
In other words – mostly usability issues. So here’s a rundown of how I decided to solve them.
Running and loading files
When I tried to run MAME’s DREAM 6800 emulator, I had a hard time even figuring out where to put the CHIPOS ROM file! MAME doesn’t ship with ROM files that are protected by copyright, which is understandable, but its documentation on how to actually get it running if you do have the ROM file is hard to find.
I reached out to Michael J. Bauer, the creator of the DREAM 6800 computer and the CHIPOS monitor program, and got permission to distribute CHIPOS with my emulator. In fact, he said it’s in the public domain. So this one was easy to solve. Thanks, Michael!
I also ended up patching CHIPOS, and it’s this patched version which comes with my emulator. You can read more about that here.
Display
I originally criticized MAME for a blurry display when scaling the window. Apparently it uses linear interpolation when scaling, making the pixels very washed out.

However, I recently found out that this was unfair of me. MAME does have an option to use a “nearest” integer-ratio interpolation that produces crisp pixels when scaling. Like everything else in MAME it’s a bit hidden away, but there’s a command line switch for it.
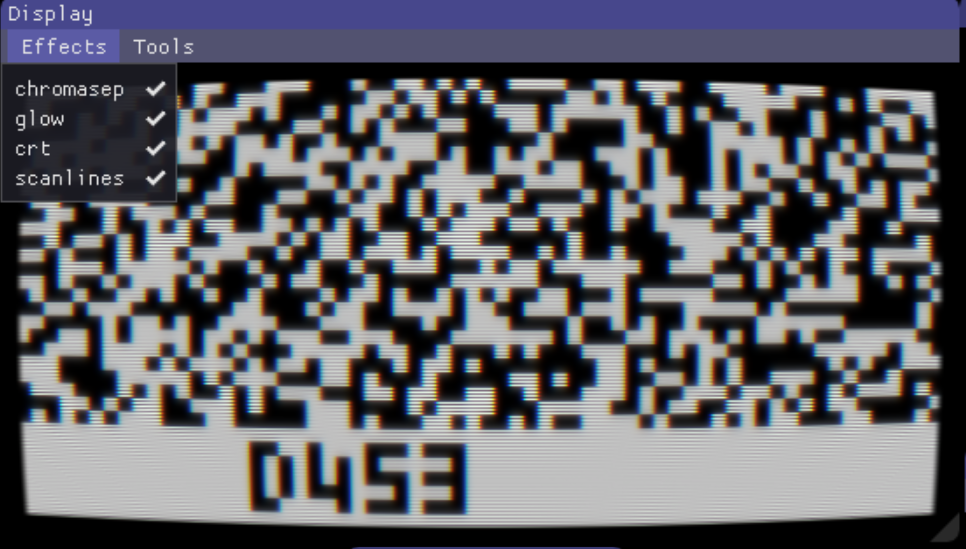
I ended up adding some shaders for an “authentic” CRT-style display, but with simple menu options to turn each of them off. I’m quite pleased with the result.
Windowing
MAME uses several windows for its debugging UI. That’s fine; sometimes I just want to see the disassembly and single step through execution, without needing to see the memory viewer.
However, these windows are actual, physical windows, and just one of them can be in focus at the time. In order to single step, you need to have the disassembly window in focus, and so you can’t simultaneously pressing a keypad key. Maybe a niche problem, but one that I actually encountered while comparing my own emulator to MAME during debugging.
Instead of doing it like this, I decided to use dear-imgui, an immediate mode GUI library that can show virtual windows within the main program’s canvas. The nice thing about this is that they don’t require focus. I ended up with a pretty flexible debugging UI that I have since reused in other forthcoming emulator projects.

Keypad
The DREAM 6800 used a hexadecimal keypad (keys labeled 0 through F), arranged in a 4x4 grid. Games for the DREAM would use keys adjacent to each other on this keypad for controls.
When the DREAM was presented as a build project in the magazine Electronics Australia, it was shown with a keypad layout similar to a regular numpad:

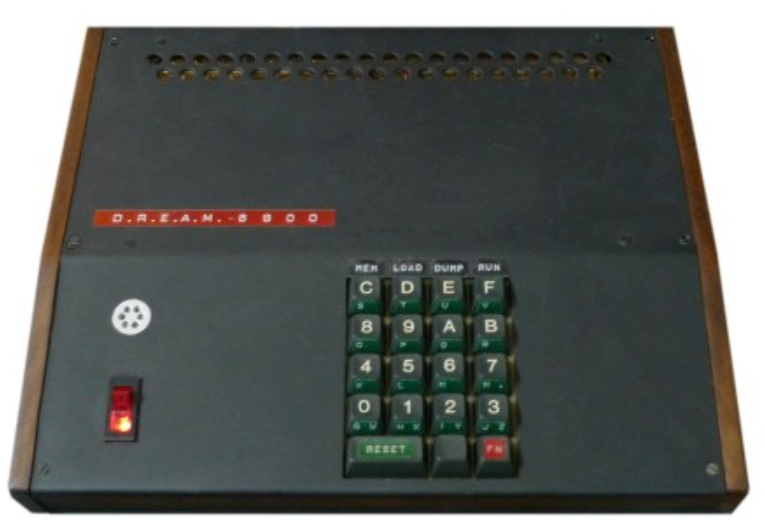
This was also the layout used by the creator’s prototype, as displayed on his website:
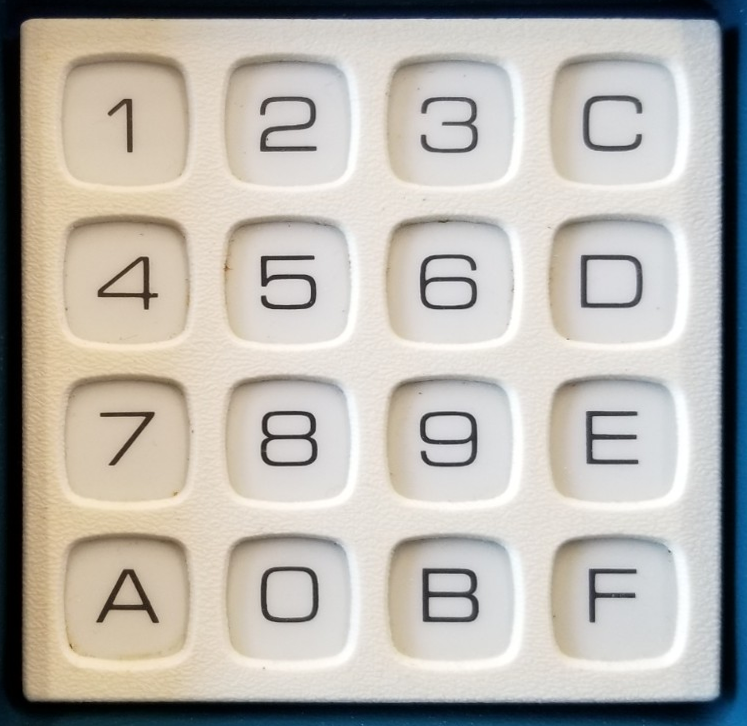
However, people built this computer with cheap and available off-the-shelf parts. Most used the readily available Digitran keypad, which had a different layout.
Most games people ran on their DREAM 6800 were CHIP-8 games, since the included “operating system” (monitor program) CHIPOS came with a CHIP-8 interpreter. Most CHIP-8 games were created for other computers than the DREAM, with yet other keypad layouts. The first CHIP-8 computer used this layout:
MAME uses the actual keyboard keys. Needless to say, this makes it very inconvenient to control any game. If a game uses D for up, 8 for left, A for right and 5 for down, for example, which would be a natural layout on the hex keypad, that game would pretty much be impossible to play using a standard QWERTY keyboard.
It’s customary for CHIP-8 “emulators” (interpreters) to use the left side of the keyboard as the keypad instead. This is of course confusing initially, but it’s really the only way to do it.
| 1 | 2 | 3 | 4 |
| Q | W | E | R |
| A | S | D | F |
| Z | X | C | V |
I obviously wanted to use these keys in my emulator, rather than MAME’s approach. I could of course also allow remapping to any key, but I didn’t really see the need, and also it seems like a pretty hard thing to make, so I didn’t do that. (I did use the keyboard scancodes, instead of the key as reported by the OS, so it wouldn’t matter if the player used QWERTY, AZERTY, Dvorak, etc.)
But I did want to let the user select any of the above keypad layouts, in order to play as many (otherwise DREAM compatible) CHIP-8 games as possible. So that’s what I did:
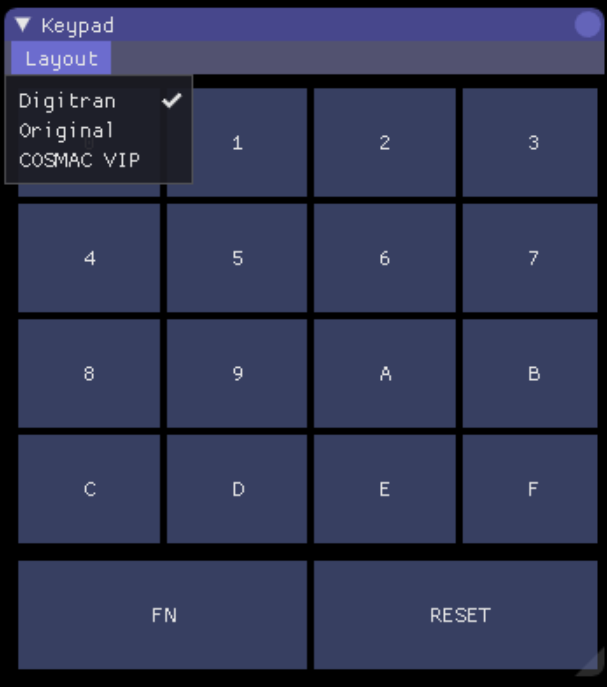
What’s next
The RetroChallenge is over, and I feel like I succeeded.
However, I still have some quality of life improvements I’d like to make, and I’ll probably blog about those too. The full list of outstanding issues is here.
I’ve learned a lot during this project: About emulation, old computers, and even some M6800 assembly. But I’m not done yet!